

Úvod do atributů události HTML
V tomto článku budeme podrobně diskutovat o atributech události HTML. Události jsou akce, které se provádějí v důsledku akce uživatele. Například, když uživatel stiskne klávesu na klávesnici pro čtení dat, pak se říká, že se jedná o události na klávesnici. Tyto činnosti se provádějí, když se uživatel podívá na web a provede kliknutí na tlačítko nebo když se stránka načte po stisknutí tlačítka obnovení, kde prohlížeč na stránkách manipuluje, všechny tyto akce jsou považovány za událost. Zde projdeme základní pochopení událostí a jak to funguje v prohlížeči na uživatelských akcích. V různých oknech prohlížeče se vyskytuje jiný typ událostí, které jsou vysvětleny v následujících částech.
5 hlavních atributů události HTML

V HTML je k dispozici jiná varianta událostí. A všechny tyto události mají malý blok kódu pojmenovaný jako obsluha události, který se spustí při provedení akce události. Ty jsou připojeny k elementům HTML. Obslužné rutiny událostí nebo posluchači událostí hrají důležitou roli v atributech události HTML. Podívejme se na různé typy atributů událostí, které jsou globálně deklarovány a aplikovány na prvky HTML, a také na jejich práci. Hlavně se používají čtyři atributy primární události. Oni jsou:
- Okno Událost
- Události formuláře
- Události myši
- Události z klávesnice
- Drag and drop Events
Všechny tyto atributy popíšeme jeden po druhém s příkladem. Nejprve půjdeme.
1. Okno Událost
- onafterprintEvent: Tento atribut je podporován všemi značkami Html a funguje, když se stránka začala tisknout a má skript s jednou hodnotou. Zde je příklad kódu HTML. Tento příklad ukazuje, že po stisknutí tlačítka se vytiskne zpráva vytištěná v dialogovém okně.
Kód:
Windows onafterprint Event

Windows onafterprint Event
This attribute works in IE and Mozilla

function myfun() (
alert("Document is being printed");
)
Windows onafterprint Event
Windows onafterprint Event
This attribute works in IE and Mozilla
function myfun() (
alert("Document is being printed");
)
Windows onafterprint Event
Windows onafterprint Event
This attribute works in IE and Mozilla
function myfun() (
alert("Document is being printed");
)
Windows onafterprint Event
Windows onafterprint Event
This attribute works in IE and Mozilla
function myfun() (
alert("Document is being printed");
)
Windows onafterprint Event
Windows onafterprint Event
This attribute works in IE and Mozilla
function myfun() (
alert("Document is being printed");
)
Windows onafterprint Event
Windows onafterprint Event
This attribute works in IE and Mozilla
function myfun() (
alert("Document is being printed");
)
Výstup:
- onbeforeprint: Funguje před tiskem. Událost se spustí po procesu tisku. Níže je ukázkový kód.
Kód:
body (
color: #9370DB;
background-color: #BC8F8F;
text-align: center;
padding: 20px;
)
p (
font-size: 2rem;
)

Attribute Demo
body (
color: #9370DB;
background-color: #BC8F8F;
text-align: center;
padding: 20px;
)
p (
font-size: 2rem;
)
Attribute Demo
body (
color: #9370DB;
background-color: #BC8F8F;
text-align: center;
padding: 20px;
)
p (
font-size: 2rem;
)
Attribute Demo
body (
color: #9370DB;
background-color: #BC8F8F;
text-align: center;
padding: 20px;
)
p (
font-size: 2rem;
)
Attribute Demo
spouštět k tisku.
funkce get () (
document.body.style.background = "# 00BFFF";
)
Výstup:
- onerror: Tato funkce je aktivována, když je vyvolána chyba, zatímco neexistuje žádný prvek.
Kód:

Ahoj světe.
function myFun () (alert ("problém s načtením obrazu.");
)
Výstup:

- onload: Tato funkce pomáhá při načítání objektu a funguje dobře, aby se zjistilo, zda je webová stránka správně načtena.
Kód:
onload event demo
function ldImg() (
alert("image loaded without error");
)
Výstup:

- onresize: Tato událost se spustí, když se změní velikost okna prohlížeče a jakýkoli prvek lze spustit pod atributem resize.
Kód:
onresize event
function cmg() (
alert('welcome to educba');
)
window.onresize = cmg;
onclick="alert(window.onresize);">
Výstup:
- onunload: Tato událost se spustí, když je zavřeno okno webové stránky nebo když uživatel opustí webovou stránku. Níže uvedený kód uvolní stránku, když uživatel opustí a vyvolá upozornění díky za vyhledávání. Tato událost funguje někdy ve všech prohlížečích.
Kód:
Welcometo educba tutorial
Welcometo educba tutorial
Welcometo educba tutorial
Opustit stránku.
function onfunc () (alert ("Děkuji za vyhledávání!");
)
Výstup:

2. Formuláře událostí
Funguje to s formulářem Controls. Níže jsou uvedeny atributy, ke kterým dochází při interakci uživatele s prohlížeči.
- onblur: K této události dochází, když je pozornost uživatele mimo okno formuláře. Následující příklad vezme vstup v malém a když kliknete na tlačítko Odeslat, změní výstup na Velká písmena.
Kód:
Form onblur
body (
text-align:center;
)
h1 (
color:pink;
)

EDUCBA
onblur="myfunc()">
Submit
function myfunc() (
var a = document.getElementById("aaa");
a.value = a.value.toUpperCase();
)
Form onblur
body (
text-align:center;
)
h1 (
color:pink;
)
EDUCBA
onblur="myfunc()">
Submit
function myfunc() (
var a = document.getElementById("aaa");
a.value = a.value.toUpperCase();
)
Form onblur
body (
text-align:center;
)
h1 (
color:pink;
)
EDUCBA
onblur="myfunc()">
Submit
function myfunc() (
var a = document.getElementById("aaa");
a.value = a.value.toUpperCase();
)
Form onblur
body (
text-align:center;
)
h1 (
color:pink;
)
EDUCBA
onblur="myfunc()">
Submit
function myfunc() (
var a = document.getElementById("aaa");
a.value = a.value.toUpperCase();
)
Výstup:

- onchange: Tato událost nastane, když uživatel změní existující prvek ve formuláři. Stává se to, když prvek ztratí fokus.
Kód:
HTML onchange
select the dress color
pink
Yellow
White
Poznámka: Vyberte libovolnou možnost
Popište stručně:Předložit
Výstup:
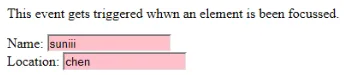
- onfocus: Tento atribut je povolen, když uživatel věnuje pozornost prvku na webové stránce nebo když je vstup zaostřen. Níže uvedený příklad se zvýrazní, když do pole zadáme vstup.
Kód:
Tato událost se spustí, když je prvek zaostřen.
Název:Umístění:
funkce onfoc (a) (
document.getElementById (a) .style.background = "pink";
)
Výstup:
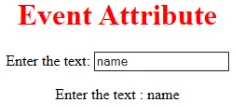
- oninput: Tato událost se spustí, když je vstup zadán do vstupního pole. Aktivuje se při změně hodnoty v textovém poli. To se projeví, jakmile se změní hodnota prvku.
HTML oninput

body (
text-align:center;
)
h1 (
color:red;
)

Event Attribute
Enter the text:

function myon()
(
var x = document.getElementById("EDUCBA").value;
document.getElementById("sid").innerHTML = "Enter the text : " +x;
)
HTML oninput
body (
text-align:center;
)
h1 (
color:red;
)
Event Attribute
Enter the text:
function myon()
(
var x = document.getElementById("EDUCBA").value;
document.getElementById("sid").innerHTML = "Enter the text : " +x;
)
HTML oninput
body (
text-align:center;
)
h1 (
color:red;
)
Event Attribute
Enter the text:
function myon()
(
var x = document.getElementById("EDUCBA").value;
document.getElementById("sid").innerHTML = "Enter the text : " +x;
)
HTML oninput
body (
text-align:center;
)
h1 (
color:red;
)
Event Attribute
Enter the text:
function myon()
(
var x = document.getElementById("EDUCBA").value;
document.getElementById("sid").innerHTML = "Enter the text : " +x;
)
Výstup:

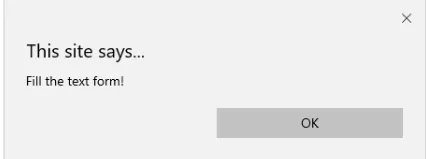
- oninvalid: Tento atribut volá události, když je text zadaný do typu vstupu neplatný nebo zůstává prázdný. Tento atribut události musí vyplnit vstupní prvek.
Kód:
example oninvalid Event
p (
color:orange;
)
body (
text-align:center;
)
HTML se používá k vytvoření webové stránky
Zadejte jméno:Výstup:

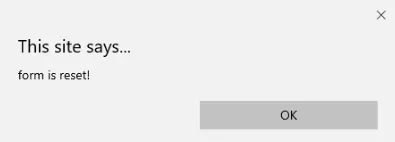
- onreset: Spustí se, když je formulář v klidu. Následující příklad říká, když odešlete tlačítko, formulář je zpracován a znovu, když kliknete na reset, bude se formulář resetovat.
Kód:
body (font-family:calibri;)
label (font-variant:small-caps;)
ol (background-color:#610000; margin-top:35px;)
li (margin-top:3px; padding:3px; background-color:rose; font-size:15px;)
div (position:absolute;top:250px;left:70px; font-size:1.5em;
)
Form with input to reset and submit
Enter input:
function onInva() (
alert("Input field cannot be empty!");
)
function onInp() (
var input_value = document.getElementById("iv").value;
document.getElementById("a_box").innerHTML = "Input value:
" + iv;
)
function onRes() (
alert("form is reset!");
)
function onSubmitEvent() (
alert("Form is loading");
location.reload();
)
Výstup:
- onsearch: Funguje, když uživatel stiskne tlačítko Enter.
Kód:
Napište do pole.
function myF () (
var k = document.getElementById ("value1");
document.getElementById ("sample"). innerHTML = "vyhledávací prvek je:" + k.value;
)
Výstup:

- onselect: Spouští se, když byl ve vstupním poli vybrán text. To vyvolá dialogové okno tisk výstražné zprávy.
Kód:
onselect demo
h1 (
color:magenta;
)
body (
text-align:center;
)

function eduhtml() (
alert("text highlighted!");
)

EDUCBA Online tutorial
Text Box:
onselect demo
h1 (
color:magenta;
)
body (
text-align:center;
)
function eduhtml() (
alert("text highlighted!");
)
EDUCBA Online tutorial
Text Box:
onselect demo
h1 (
color:magenta;
)
body (
text-align:center;
)
function eduhtml() (
alert("text highlighted!");
)
EDUCBA Online tutorial
Text Box:
onselect demo
h1 (
color:magenta;
)
body (
text-align:center;
)
function eduhtml() (
alert("text highlighted!");
)
EDUCBA Online tutorial
Text Box:
Výstup:

- onsubmit: Účelem této události je provedení akce provedené při stisknutí tlačítka Odeslat.
Kód:
Onsubmit Example
Enter name:
Email :
function myF() (
alert("The form was submitted");
)
Výstup:
3. Atributy klíčové desky
- OnKeyDown: Spouští se, když uživatel stiskne klávesu se šipkou dolů.
Kód:
Příklad pro Onkeydown.
function mykedwn () (
výstraha ("stisknutí tlačítka je aktivní");
)
Výstup:
- OnKeyPress: Tato událost se spustí, když uživatel stiskne libovolnou klávesu na klávesnici. Poznámka: Některé prohlížeče nepodporují stisknutí žádné klávesy.
Kód:
Tento příklad ukazuje, kdy uživatel v textové oblasti spustí událost
>Výstup:

- OnKeyUp: Tento atribut se spustí, když uživatel uvolní kurzor z textového pole. Níže je ukázka.
Kód:
Tento příklad transformuje znak na malá písmena.
Vyplňte jméno:function mykey () (
var g = document.getElementById ("jjj");
g.value = g.value.toLowerCase ();
)
Výstup:

4. Atributy události myši
Tato akce spustí událost myši, když je myš stisknuta z počítače nebo z jakéhokoli externího zařízení, jako je smartphone nebo tablet. Níže jsou uvedeny některé události myši:
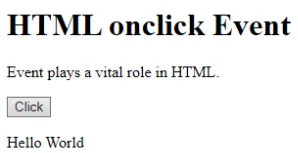
- onclick: Spouští se, když uživatel stiskne tlačítko myši. Níže je uveden příklad vstupu, který ukazuje událost při kliknutí myší.
Kód:
HTML onclick Event
HTML onclick Event
HTML onclick Event
Událost hraje zásadní roli v HTML.
Klikněte nafunction oncf () (
document.getElementById ("sample"). internalHTML = "Hello World";
)
Výstup:
- onmousemove: Spustí se, když se myš pohybuje myší přes obrázek v libovolném směru.
Kód:
Event onmousemove demo
Tato událost je aktivována, když ukazatel táhne svůj směr.
Ukázkový textVýstup:
- Onmouseup: Tato událost dává upozornění, když uživatel uvolní tlačítko na výstupu.
Kód:
body (
color: "#ff0000";
height: 120vh;
background-color: #610000;
text-align: center;
)
.polygon (
float: right;
shape-inside: polygon(0 0, 0 200px, 100px 200px);
clip-path: polygon(0 0, 0 250px, 100px 300px);
height: 200px;
width: 200px;
background: linear-gradient(to bottom left, #7CFC00, #8B008B);
)
p (
margin: 30px auto;
)

HTML onmouseup Demo
body (
color: "#ff0000";
height: 120vh;
background-color: #610000;
text-align: center;
)
.polygon (
float: right;
shape-inside: polygon(0 0, 0 200px, 100px 200px);
clip-path: polygon(0 0, 0 250px, 100px 300px);
height: 200px;
width: 200px;
background: linear-gradient(to bottom left, #7CFC00, #8B008B);
)
p (
margin: 30px auto;
)
HTML onmouseup Demo
klikněte pod objektem
funkce mupFn () (document.querySelector ('. polygon'). style.transform = 'scale (2.2)';
)
Výstup:

- Onmouseover: Spustí JavaScript, když přesunete ukazatel myši na obrázek
Kód:
Example demonstrating Onmouseover.
Mouse over
function A() (
document.getElementById("sample").style.color = "yellow";)
function B() (
document.getElementById("sample").style.color = "green";
)
Example demonstrating Onmouseover.
Mouse over
function A() (
document.getElementById("sample").style.color = "yellow";)
function B() (
document.getElementById("sample").style.color = "green";
)
Example demonstrating Onmouseover.
Mouse over
function A() (
document.getElementById("sample").style.color = "yellow";)
function B() (
document.getElementById("sample").style.color = "green";
)
Example demonstrating Onmouseover.
Mouse over
function A() (
document.getElementById("sample").style.color = "yellow";)
function B() (
document.getElementById("sample").style.color = "green";
)
Výstup:
5. Přetáhněte atributy událostí
Tato aplikace pomáhá v okně HTML, když uživatel přetáhne vstupní prvek. Níže jsou uvedeny různé posluchače událostí používané v HTML k ukládání přetažených dat.
- Ondrag: Používá se, když je prvek přetahován z webové stránky.
- Ondragstart : Toto se spustí, když uživatel začne přetahovat ze vstupního pole. Níže uvedený příklad ukazuje přetažení oblasti s dvěma cíli.
Kód:
#b1, #b2 (
float:left;padding:11px;margin:11px; -moz-user-select:none;
)
#b1 ( background-color: #FF6699; width:65px; height:85px; )
#b2 ( background-color: #808000; width:180px; height:180px; )

function dStart(e) (
e.dataTransfer.effectAllowed = 'move';
e.dataTransfer.setData("Text", e.target.getAttribute('id'));
e.dataTransfer.setDragImage(e.target, 0, 0);
return true;
)


Drag demo
Drag the box.
ondragstart = "return dStart(e)">
Drag it
welcome
#b1, #b2 (
float:left;padding:11px;margin:11px; -moz-user-select:none;
)
#b1 ( background-color: #FF6699; width:65px; height:85px; )
#b2 ( background-color: #808000; width:180px; height:180px; )
function dStart(e) (
e.dataTransfer.effectAllowed = 'move';
e.dataTransfer.setData("Text", e.target.getAttribute('id'));
e.dataTransfer.setDragImage(e.target, 0, 0);
return true;
)
Drag demo
Drag the box.
ondragstart = "return dStart(e)">
Drag it
welcome
Výstup:

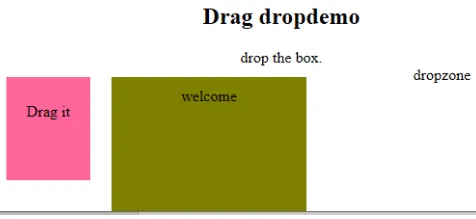
- ondrop: Tento atribut spusťte, když je v prvku přetažitelný prvek.
Kód:
#b1, #b2 (
float:left;padding:11px;margin:11px; -moz-user-select:none;
)
#b1 ( background-color: #FF6699; width:65px; height:85px; )
#b2 ( background-color: #808000; width:180px; height:180px; )

function dStart(e) (
e.dataTransfer.effectAllowed = 'move';
e.dataTransfer.setData("Text", e.target.getAttribute('id'));
e.dataTransfer.setDragImage(e.target, 0, 0);
return true;
)


Drag dropdemo
drop the box.
ondragstart = "return dStart(e)">
Drag it
ondrop="drop(event)"
ondragover="allowDrop(event)">
welcome
dropzone
Výstup:
Závěr
Tento atribut události pomáhá učinit webovou aplikaci velmi snadnou a atraktivní. Různý výskyt akcí generuje různé události. I když se tomuto přístupu obecně vyhýbáme, ale programátor se rád naučí funkci přiřazenou událostem s atributy HTML a tyto obsluhy událostí jsou stále prováděny k zkrášlení webových stránek.
Doporučený článek
Toto je průvodce atributy událostí HTML. Zde diskutujeme Úvod do atributů události HTML spolu s implementací kódu a výstupem. můžete také projít naše doporučené články a dozvědět se více -
- Stručný úvod do HTML rámců
- Úprava atributu stylu HTML
- Aplikace HTML | Top 10 použití
- 10 nejlepších rozdílů HTML vs HTML5 (infografika)
- Throw vs Throw | 5 hlavních rozdílů, které byste měli vědět
- Nastavte barvu pozadí v HTML s příkladem